Plans are now available from Duckworks BBS.
Updated on 3-4-2018
Scroll down to view the construction pictures, after the plans pages.

- CONSTRUCTION PICTURES -
Built by Quincy Maxwell of Temora, Australia
These are general photos of construction, taken at various phases of the build.
They do not represent any specific assembly detail, and are for visual purposes only.
------------------------------------------------------------------------------------------------------------------------------------------------
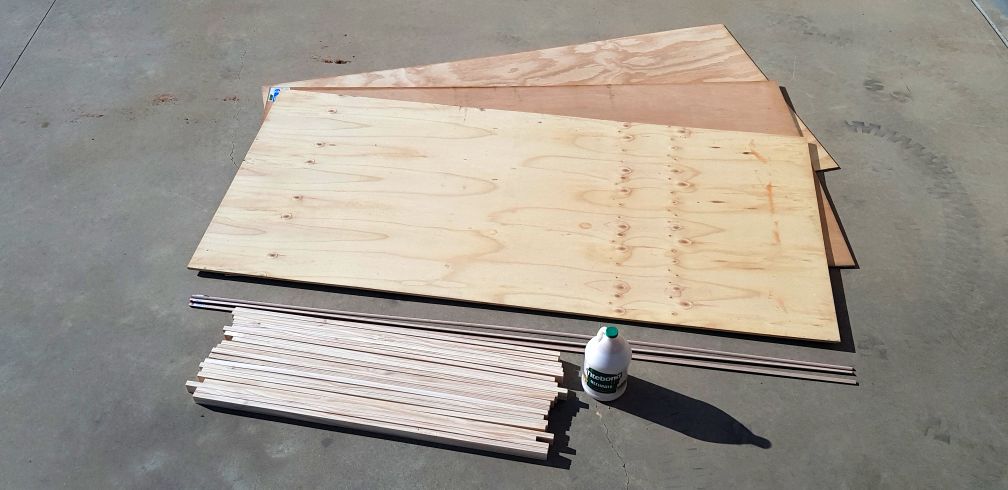
DAY 1 - BASIC MATERIALS
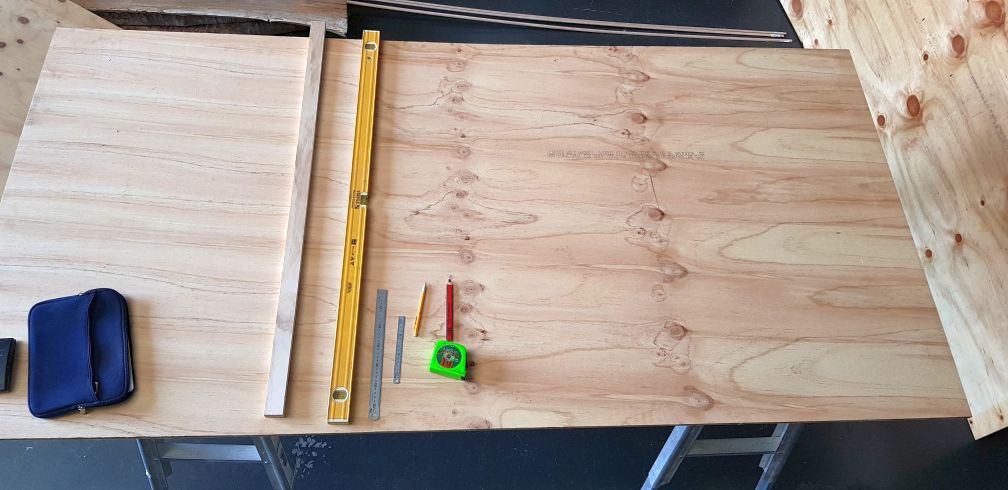
MARKING TOOLS
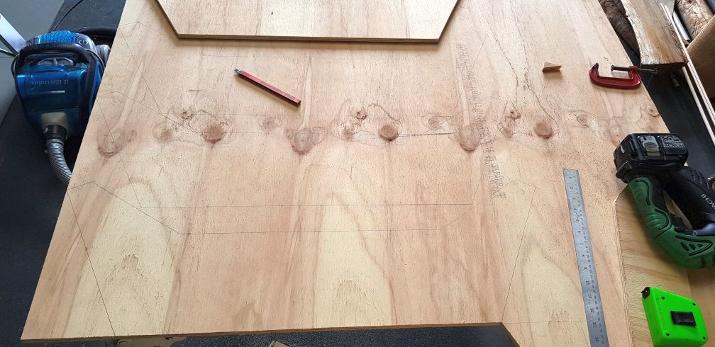
LAYOUT and CUTS
DAY 2 - ALL 4 BULKHEADS CUT TO SIZE

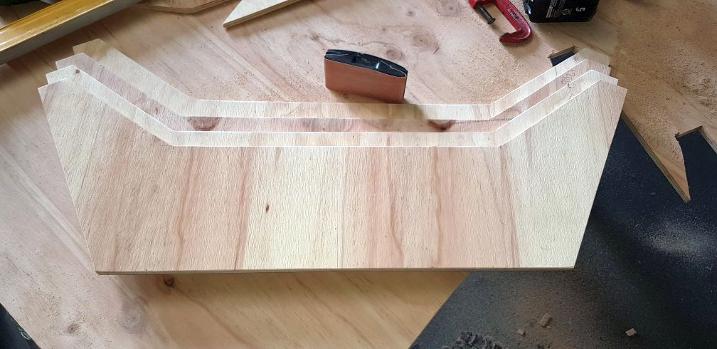
CUTTING EDGE SUPPORTS
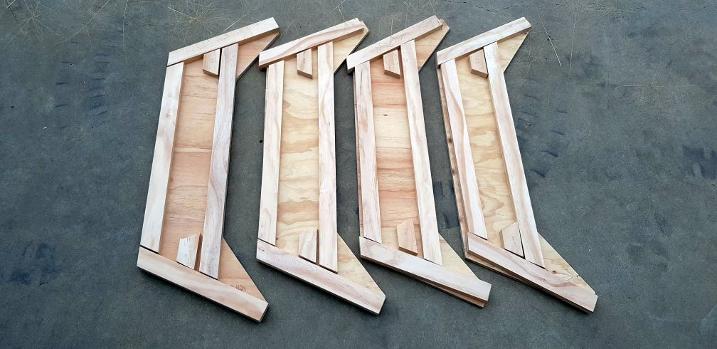
EDGE SUPPORTS FITTED TO ALL BULKHEADS
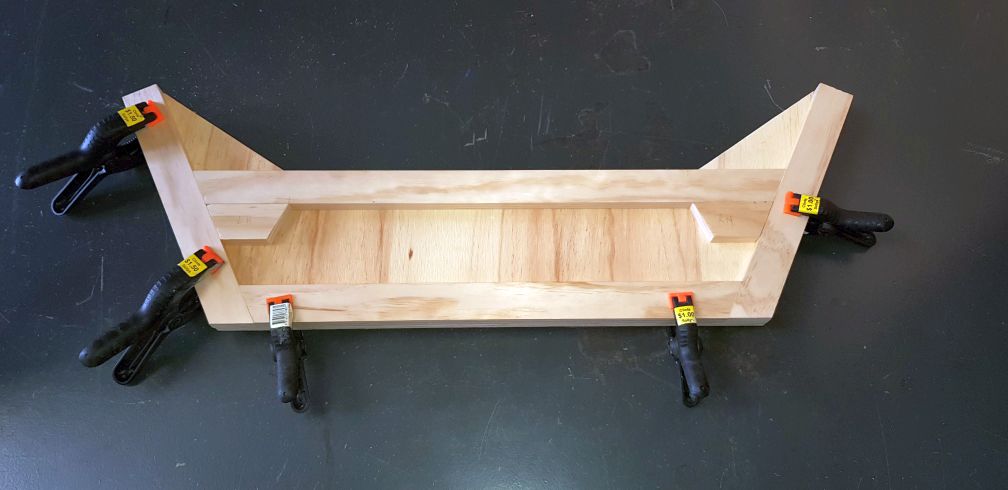
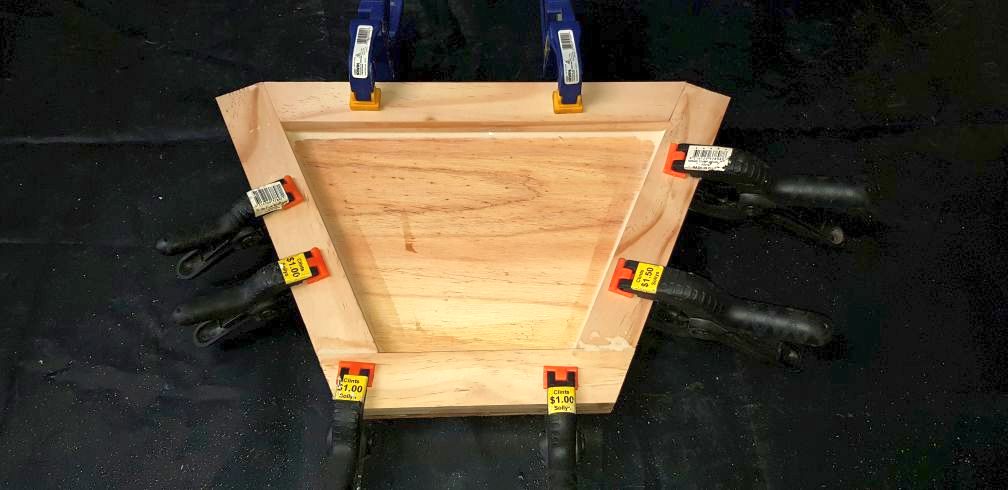
SUPPORTS GLUED and CLAMPED IN PLACE
Looks like Quincy is treating this like an assembly line, very organized and accurate.
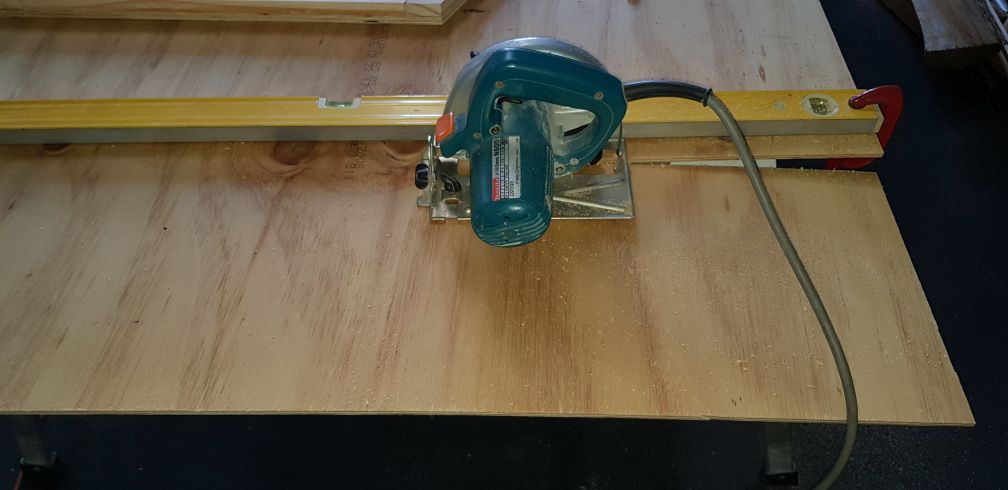
DAY 3 - CUTTING the SIDE PANELS
SIDE PANEL to BULKHEAD ASSEMBLY
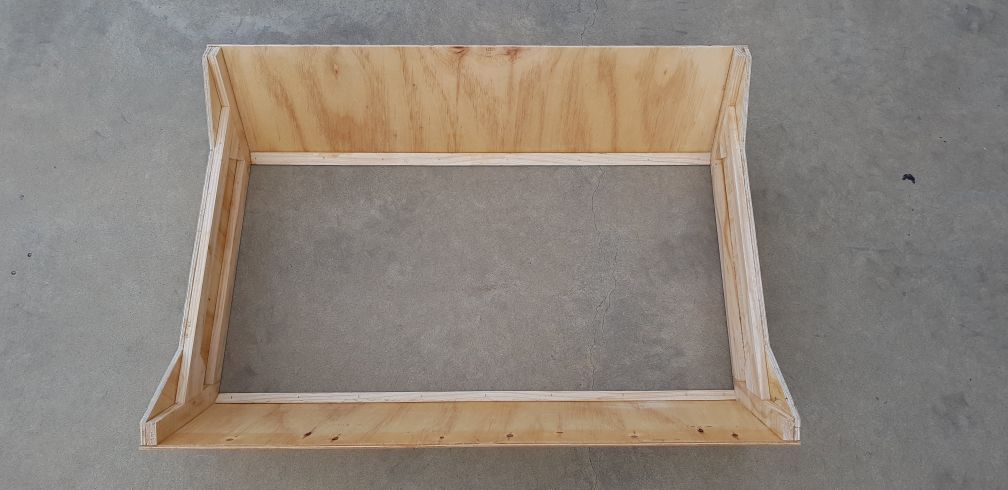
CENTER MODULE SIDE PANEL ASSEMBLY
DAY 4 - SMOOTHING EDGES WITH SANDING BAR IN PREPARATION FOR BASE ASSEMBLY.
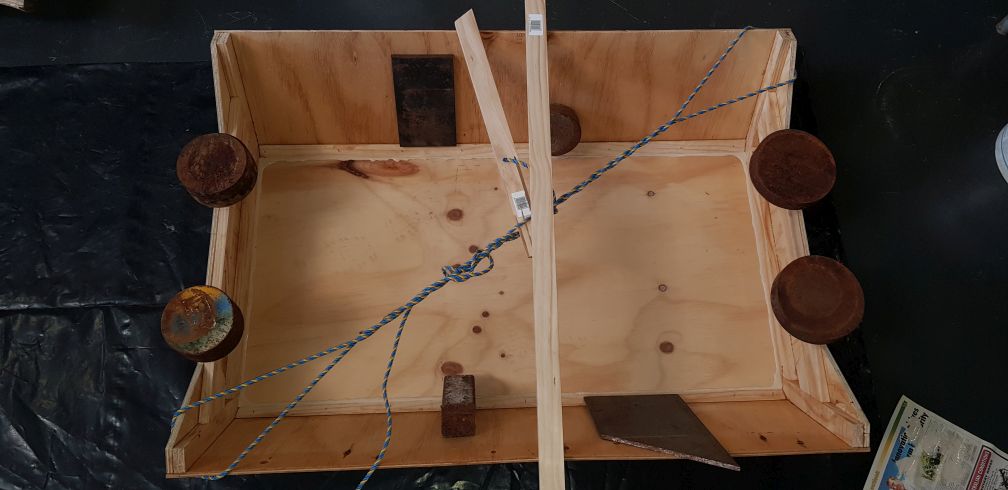
MODULE TURNED OVER, WEIGHED DOWN AND TWINE PULLED TIGHT FROM OPPOSING CORNERS TO ELIMINATE TWIST.
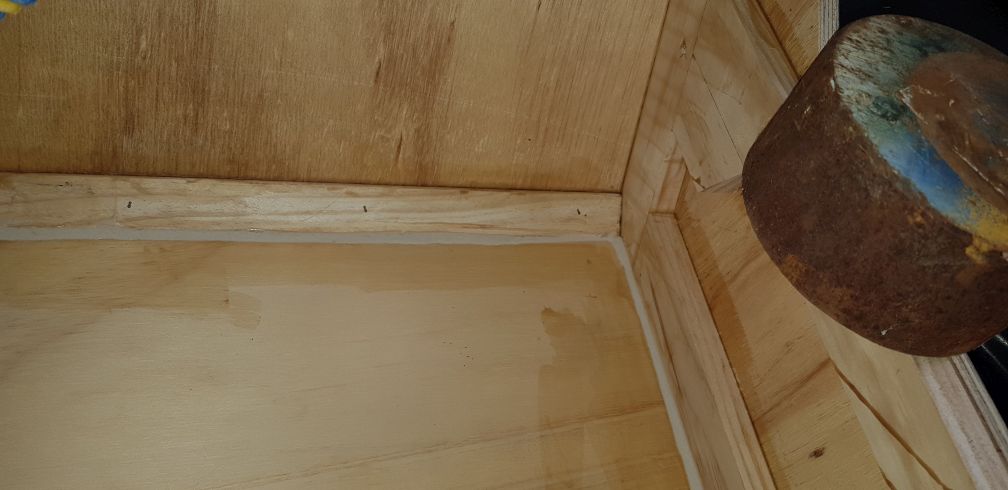
INSIDE VIEW OF BASE SEAMS, WAITING FOR TB3 GLUE TO CURE. NOTE WEIGHT TO KEEP MODULE FLAT.
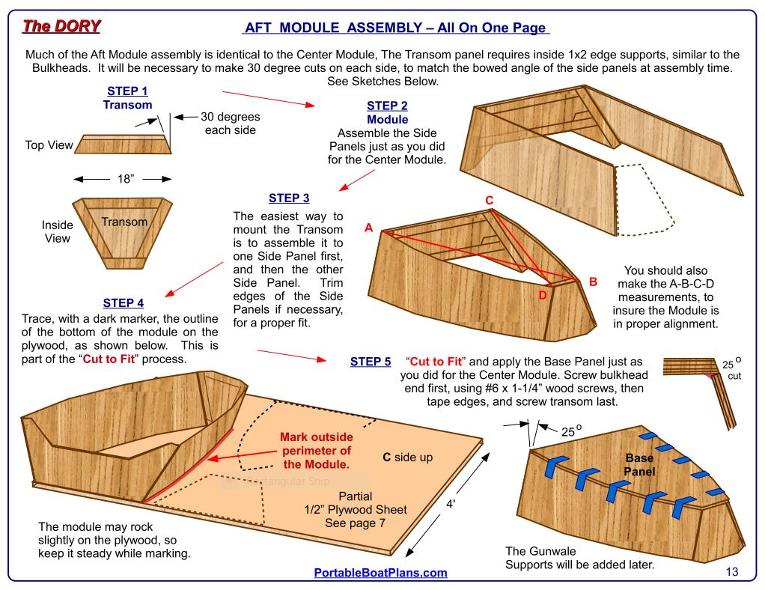
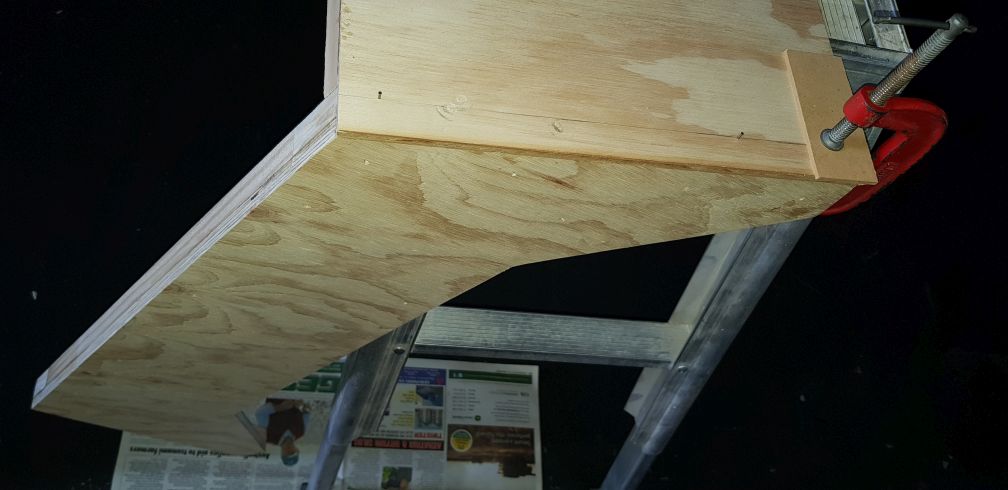
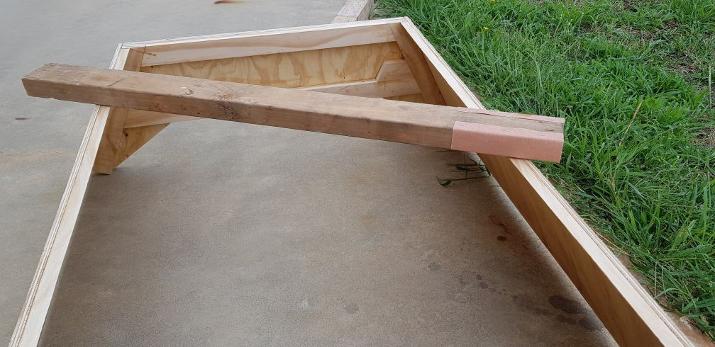
DAY 5 - TRANSOM ASSEMBLY
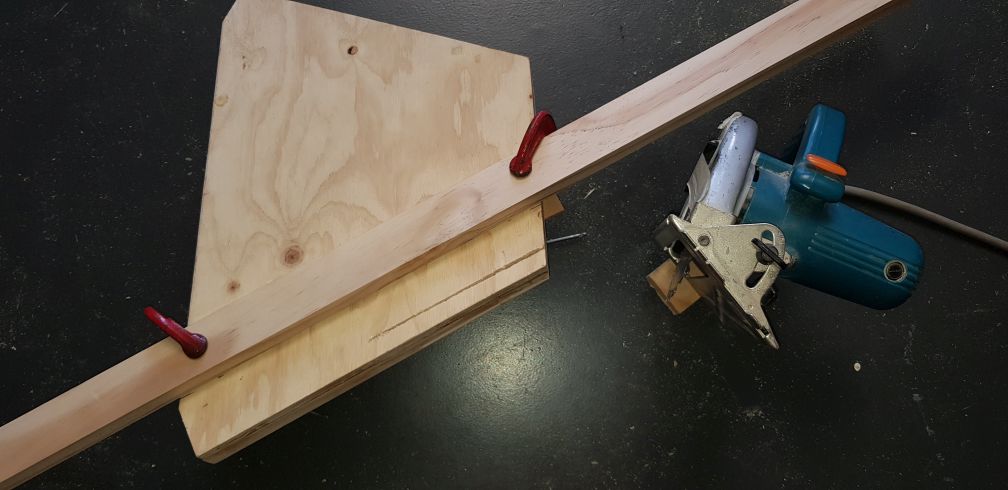
SETUP FOR CUTTING the 30 DEGREE ANGLE on TRANSOM SIDES.
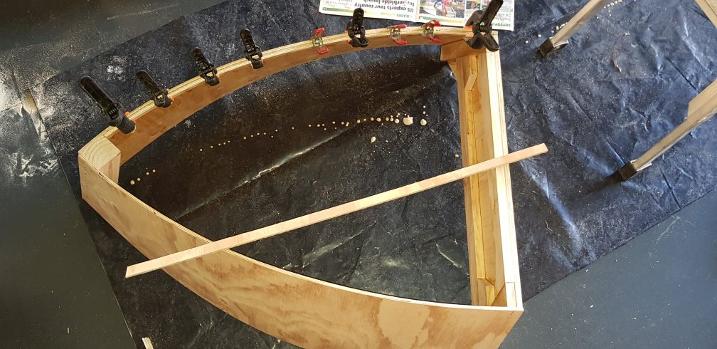
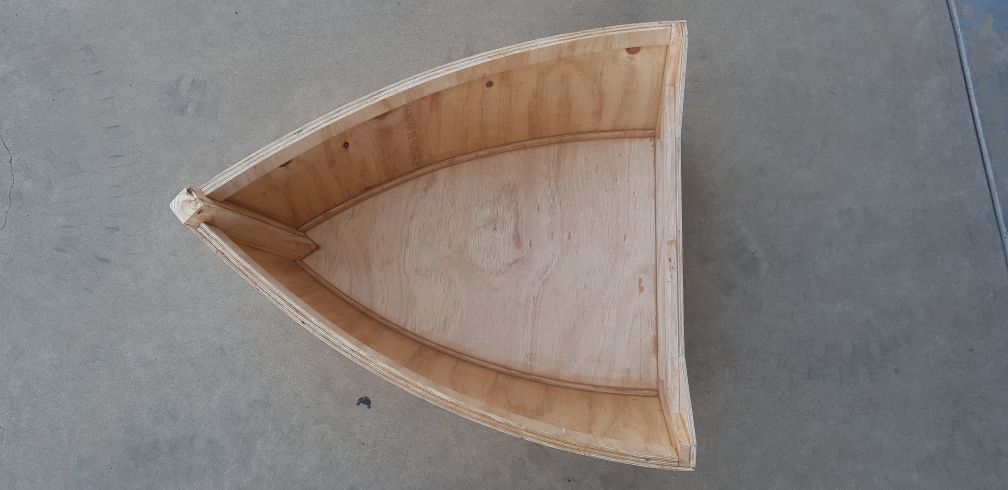
DAY 6 - BEGINNING ASSEMBLY of the FORWARD MODULE.
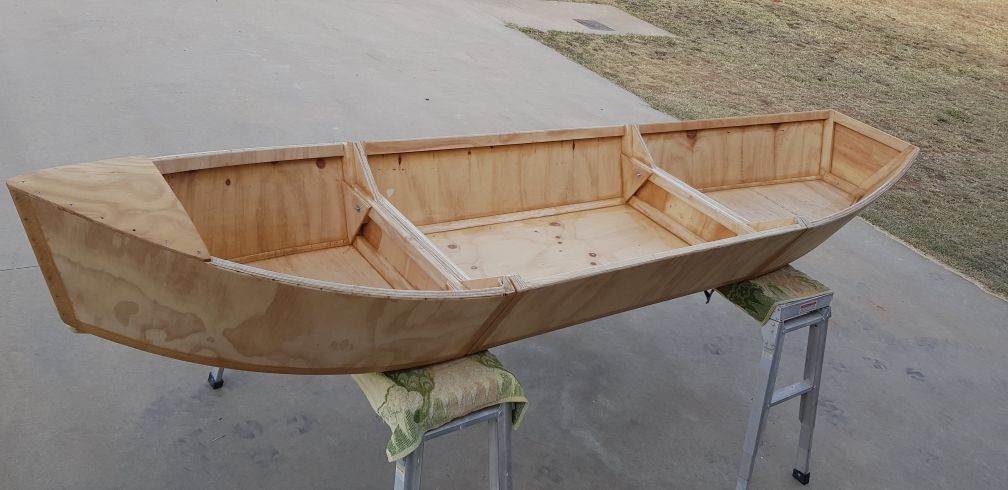
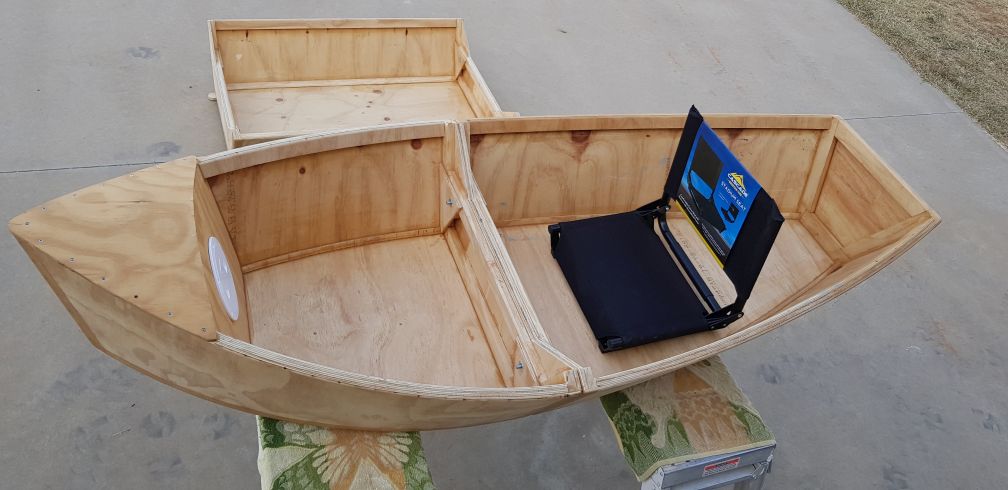
FINALLY, A VIEW OF THE 3 MODULES CLAMPED TOGETHER, AND WHAT THE COMPLETED HULL WILL LOOK LIKE.

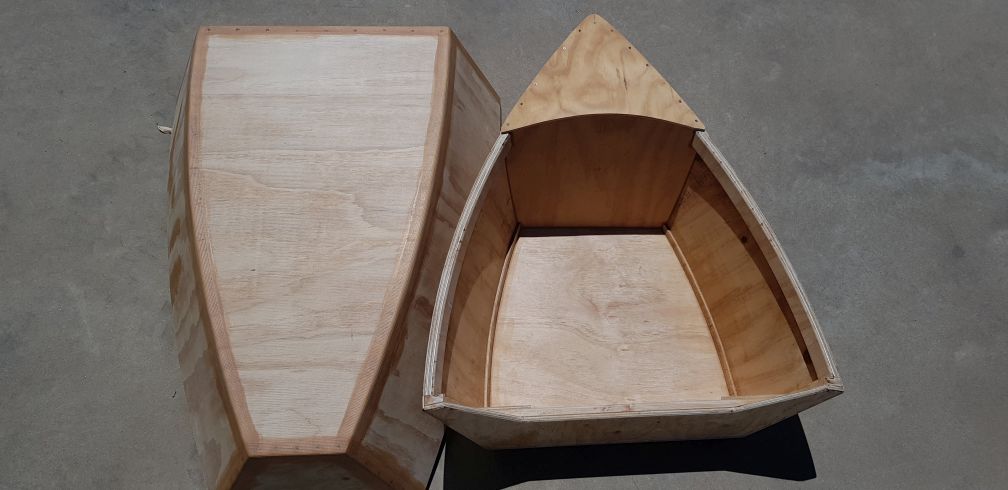
A TEST OF NESTING THE MODULES. PERFECT.
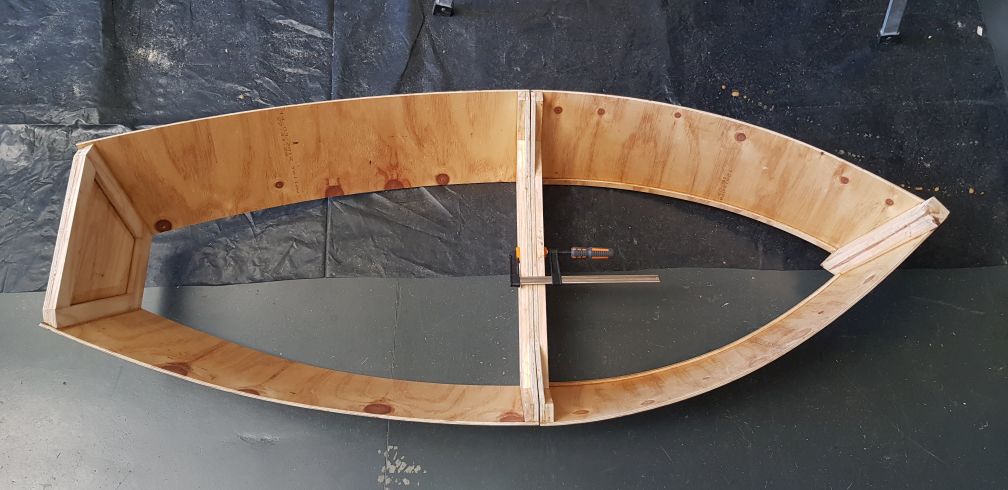
AND A FIT TEST TO SEE WHAT THE SKIFF VERSION WOULD LOOK LIKE. LOVE IT !

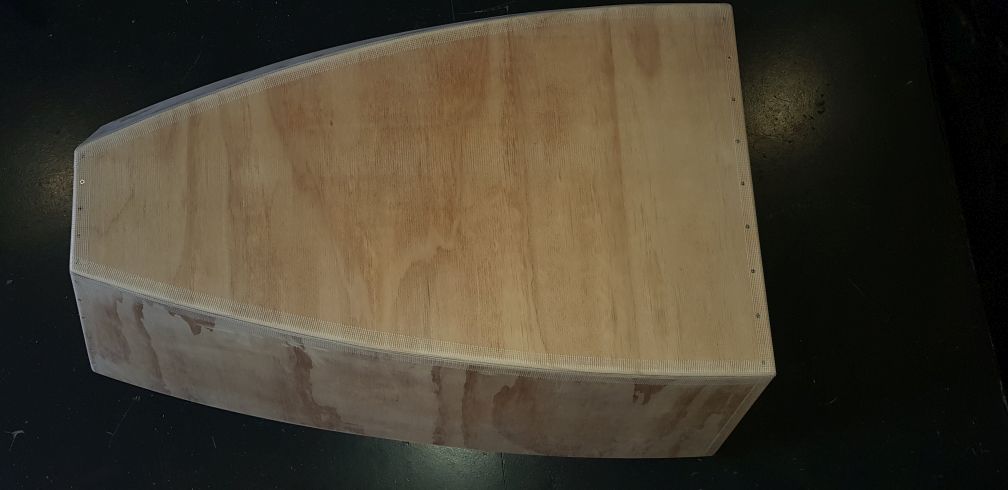
DAY 7 - NOW ON TO THE MORE DIFFICULT WORK OF PREPARING AND MOUNTING OF THE BOTTOM PANELS.

AN END VIEW OF THE TRANSOM. NOTE THE BASE RIGHT EDGE HAS BEEN TRIMMED, THE LEFT, NOT YET.
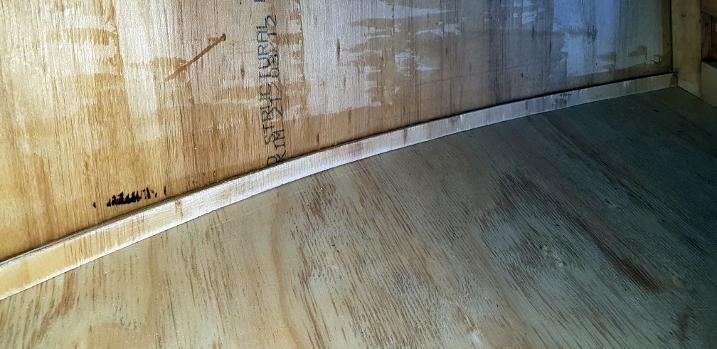
INTERIOR VIEW of ASSEMBLED REAR BASE. NOTE the 1/4" x 3/4" CHINE STRIP WHICH STRENGTHENS the ASSEMBLY.
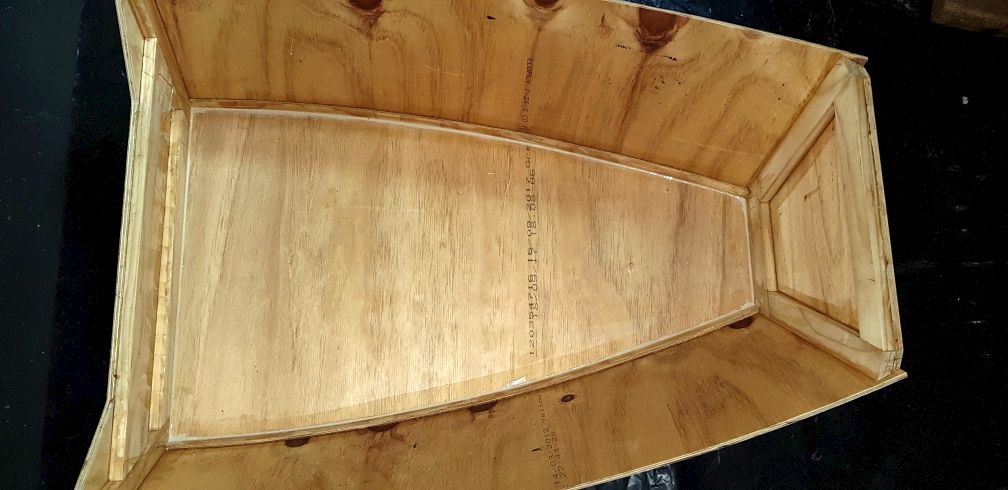
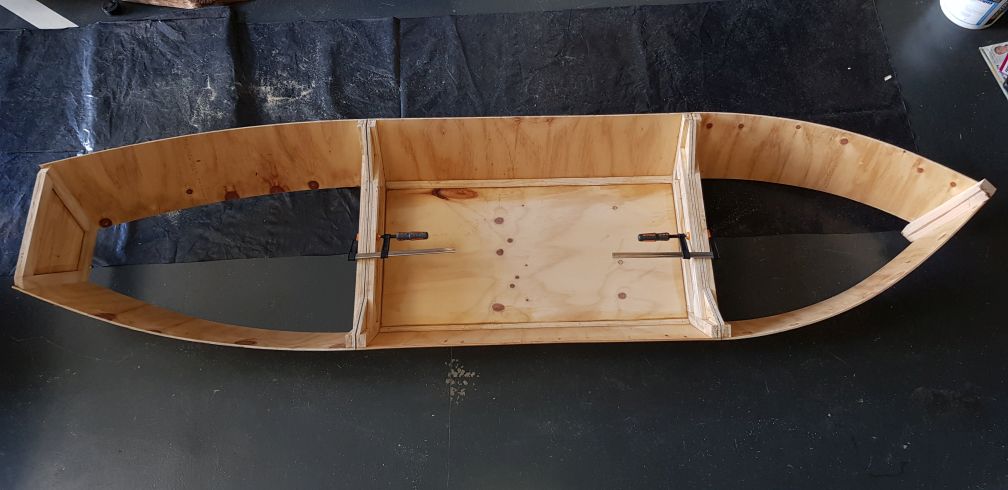
DAY 8 - TOP VIEW OF THE REAR MODULE ASSEMBLY. THE GUNWALE SUPPORTS ARE NEXT.
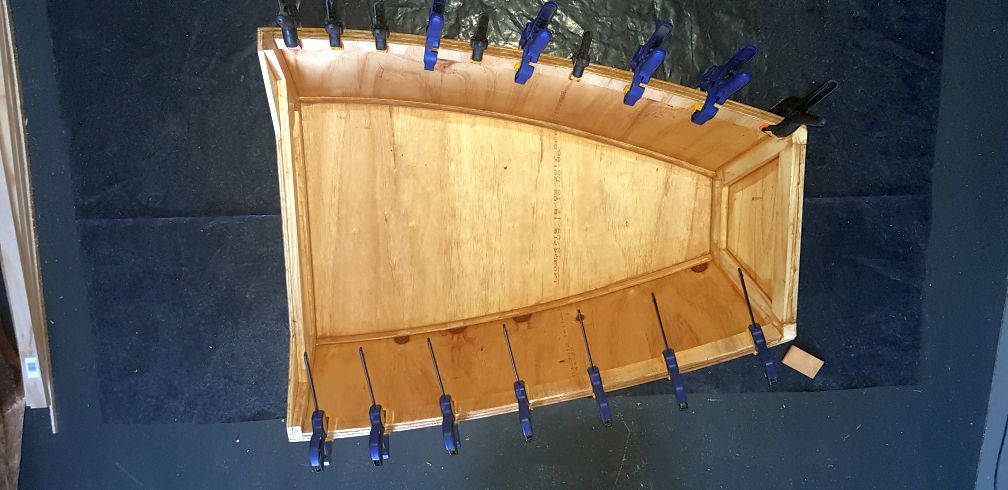
1/4" X 3/4" INTERNAL GUNWALE SUPPORTS BEING GLUED IN PLACE
DAY 9 - FORWARD MODULE GUNWALE STRIPS COMPLETE, BOW BLOCK TRIMMING NEXT.
DAY 10 - THE REAR MODULE SEAMS FINALLY TAPED and GLUED, TWO COATS.
BOTH FORWARD and REAR MODULES NOW COMPLETE, WITH DECK HATCH TO BE ADDED.
Quincy's comments regarding the assembly and the Tape & Glue process :
I
wasn’t looking forward to taping. I have experienced tape lifting on
gyprock wall joints before. So, I used a can of spray glue to coat the
sticky side of the tape to help adhesion. It worked quite well with only
a couple of spots lifting. I have now taped and two coated the front
module. Tomorrow I will begin to fit the skids. It appears I have
reached the 90% done, 90% to go point. All the modules seem to be very
robust at this stage so skids will only improve the hull's rigidity. I
am itching to get this on the lake!
DAY 15 - ALL 3 MODULES COMPLETED. READY FOR WATERPROOFING AND A FINISH.
THE SKIFF VERSION ASSEMBLED. CUTE ! NOTE ENCLOSED BOW.
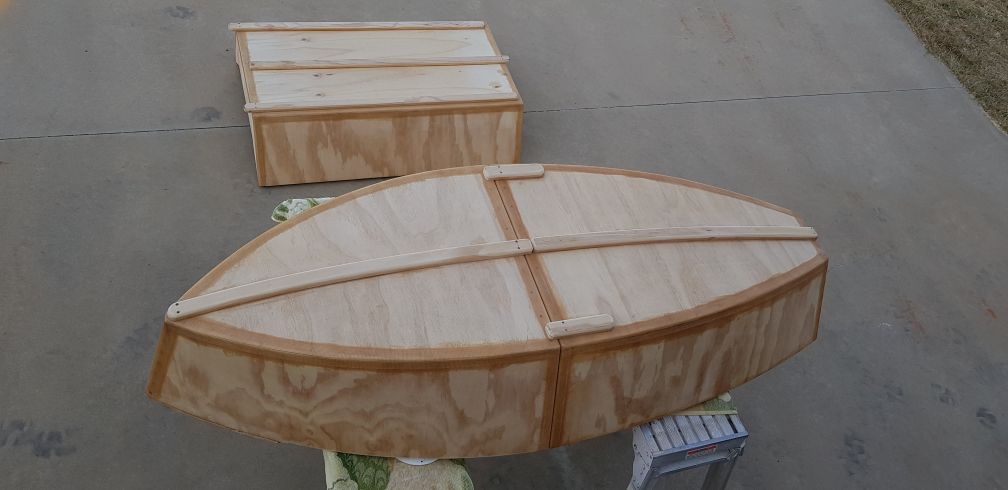
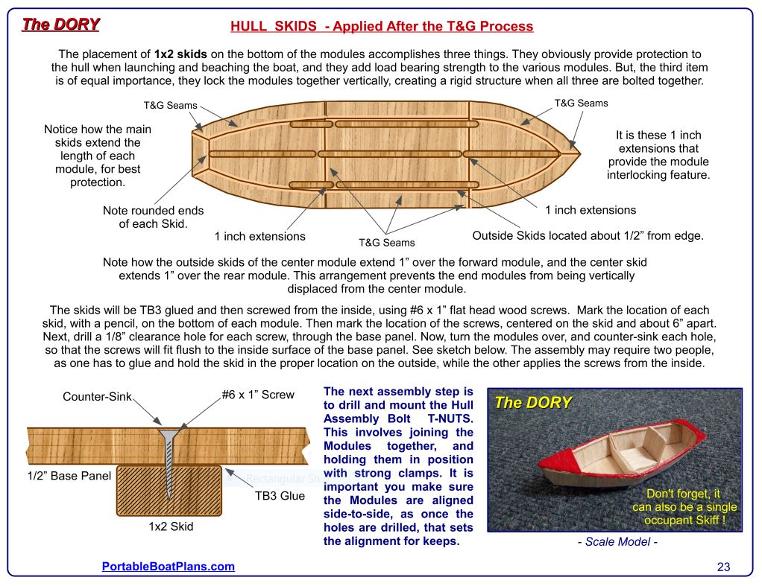
ALL BOTTOM SKIDS IN PLACE. ALSO NOTE THE INTERLOCKING FEATURE.
"Well, the build is about done! Sand, waterproof and paint left now.
Some of my thoughts about this project in no particular order.
Your
plans are very well developed and easy to follow. I don’t believe I
found any particular errors. This boat seems to me to be quite strong
even with 3/8 fore and aft floors. I have no plans of any battens inside
the floors at this stage. I think I will lean toward two module boats
from here, even if the long module is a little more than only four feet.
This is not a weekend build however, and if it is done for the right
reasons it should be a very satisfying project, providing a great asset
for decades if looked after. Some people build things because they want
the finished product and don’t take time to enjoy the building, this
leads to disappointment, frustration and sadly abandonment.
The laminated ply technique for upper and lower side reinforcing is something I will use again, as it worked out very well. I
expect to use 3/4 of the gallon of Titebond on this boat. However,
Titebond would not be my choice in future taping projects due mainly to
it's thin consistency and excess shrinkage when drying. The standard
tape used seems to have held glue not too badly, but I will get some of
your preferred Ultra-Thin type for the next job."
Quincy
Ken's response to Quincy's comments:
I
am very grateful that Quincy chose the Dory plans, as I was unable to
construct the prototype. He has done a great job of bringing the design
to life, and has contributed numerous build mods that have already been
incorporated into the plans. His statement regarding why people build
boats is all too true, so take it to heart.
Quincy
is also correct regarding the use of Titebond glue, as it is intended
for thin gap bonding conditions. When used in applications such as the
T&G Process, it must be applied in thin sections, the sole reason
that Ultra-Thin Drywall Tape is recommended. Standard drywall tape is
too thick and the weave too wide, which requires extra glue to fill the
pores. Not good.
Finally,
constructing a 3 module hull is more time consuming, and does requires
more material. It's only advantage is the ability to fit into smaller
vehicles. So, if you, like Quincy, wish to make the Dory into a 2 module
hull, let me know and I will add those layouts to the plans.
In
conclusion, the whole Dory project would not have come to fruition if
not for Quincy's involvement. But more importantly, it is the quality of
his work and his dedication to make it right that impresses me the
most. Thank you Quincy.
Ken
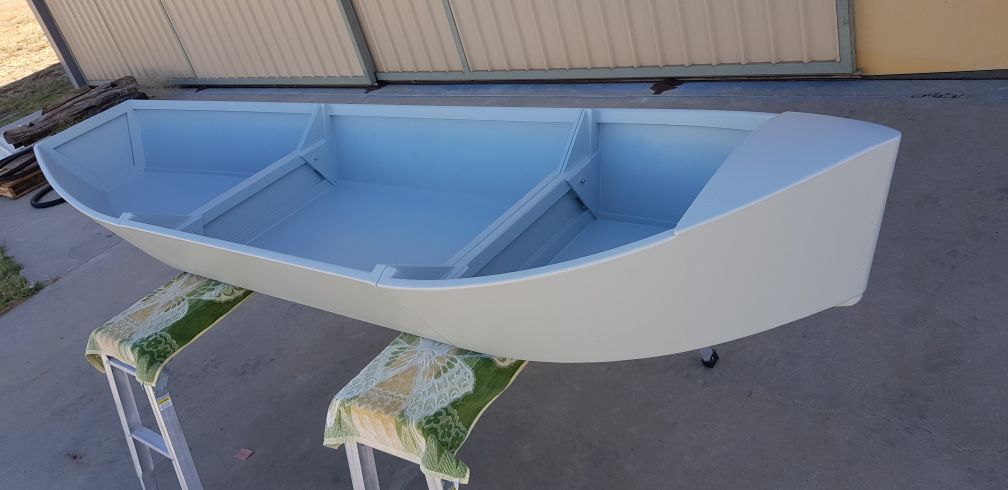
DAY 20 - ABOVE IS THE COMPLETED HULL, ALL PRIMED AND PAINTED.
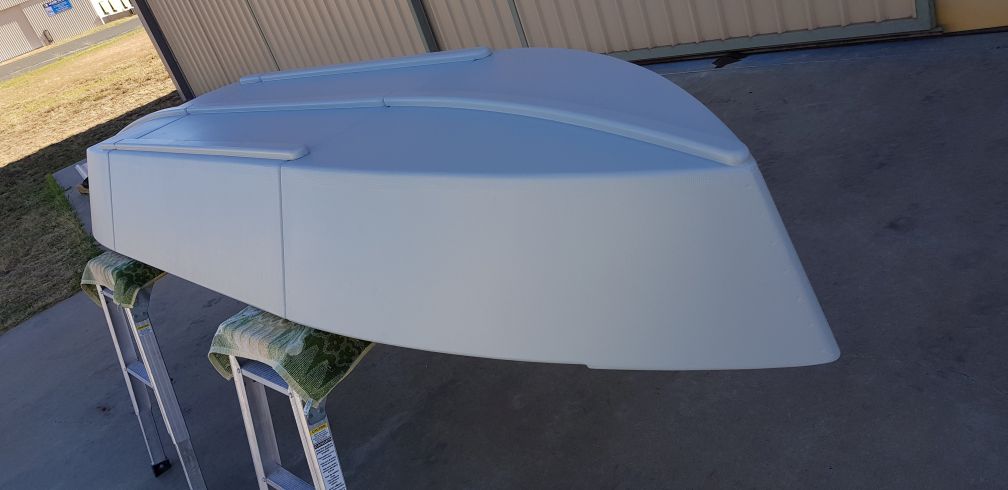
THE BOTTOM VIEW, WHICH SHOWS THE SMOOTH TRANSITION OF THE HULL PANELS.
NEXT PICTURES WILL BE OF DORY IN THE WATER !
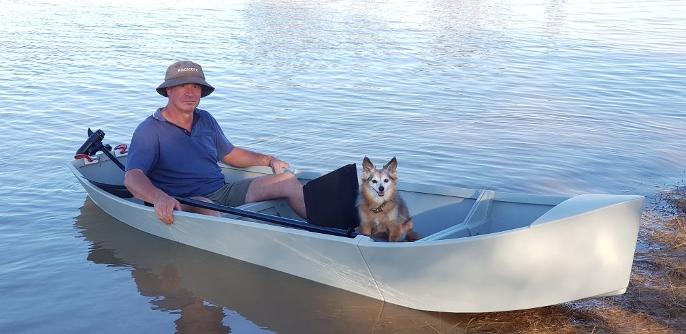
DAY 22: THE MAIDEN VOYAGE, WITH 'RIVET' AS A GUIDE.
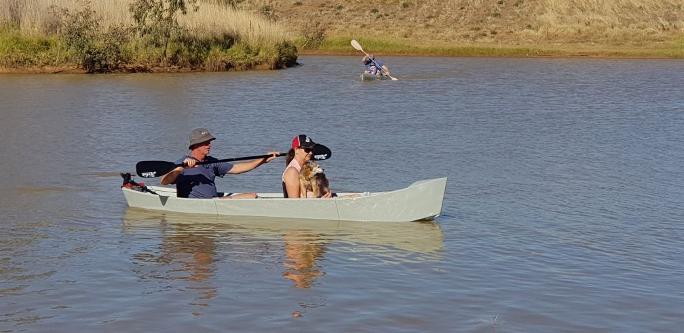
AN AUSTRALIAN FAMILY DAY ON THE WATER.


Aucun commentaire:
Enregistrer un commentaire