The CPB-2016
This is an 8
foot Coroplast pram design that can be made in a day, fit in any car,
and enjoyed for years. Especially designed for those that want to get
onto the water at a moments notice. And they can, because it's already
in the car !
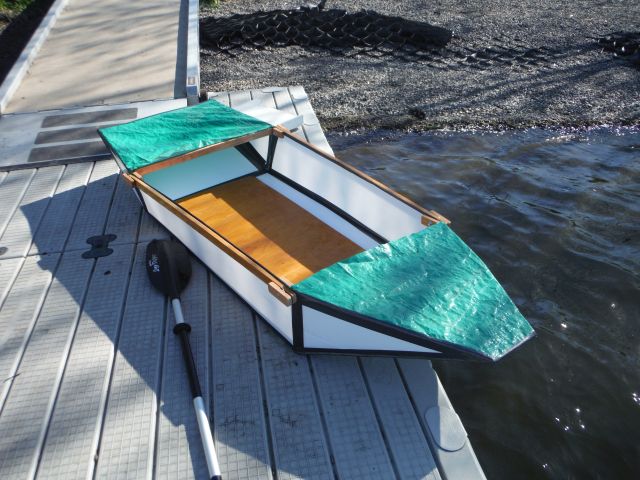
The essence of this design lies in its simplicity. Contrary to my previous Coroplast boats, only a single knife cut is required to construct the hull. All features are straight line score marks and folds in the material. To hold it all together, Scotch Waterproof Tough Tape (No Residue type) is utilized on all seams, folds and edges, which produces a fully waterproof hull, that is lightweight and as tough as it is good looking. And, with a capacity of 210 pounds, almost anyone can enjoy the freedom of boating, many for the first time.
There are a series of small details, like the side and lateral supports, and tarp end covers, that turn the CPB into a real useful small boat design. The hull itself is unsinkable, and the fact that it can fit in the back seat of any car makes it a take anywhere, anytime, get out on the water wonder.
7/28/2016 - A new assembly video has been added to the bottom of this page. And, may I remind you that the finished boat weighs only 16 pounds, and when folded occupies a volume of only 4 feet long, 2.5 feet wide and 6 inches thick. It fits in any car, is very easy to portage, and costs about $80 to make. Unconventional ? Yes. Practical ? You bet !

Sept. 9, 2016 The latest video of the quick launching process of the CPB-2016 Coroplast Pram.
This is the prototype hull, constructed by Greg Marston, of Oregon, USA.
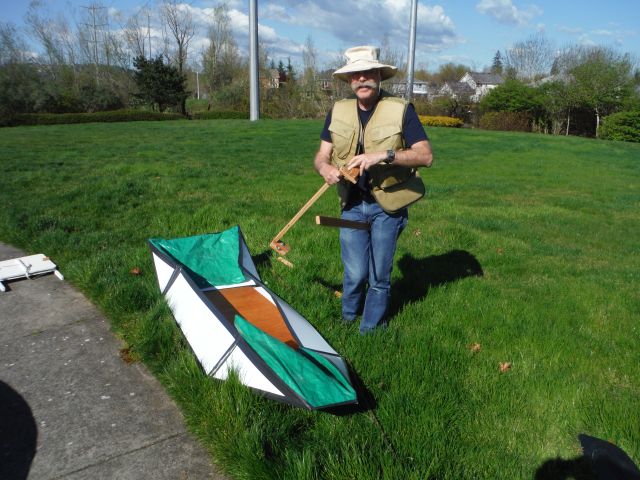
Here, Greg is unfolding the hull sides and tarp covers, getting ready for assembly.
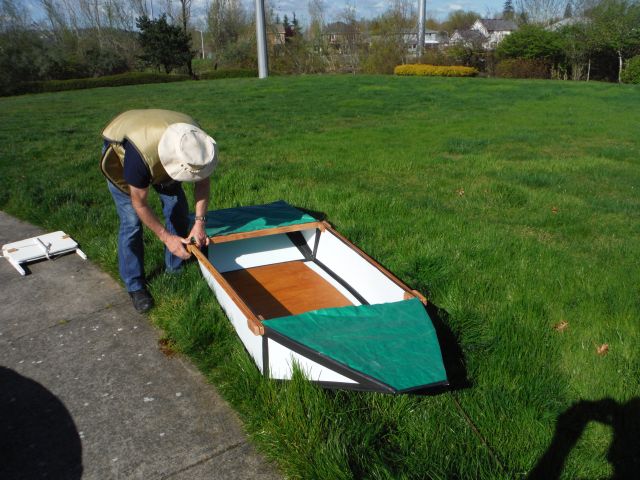
Floorboard and side supports in place, installing the lateral supports, front and back.
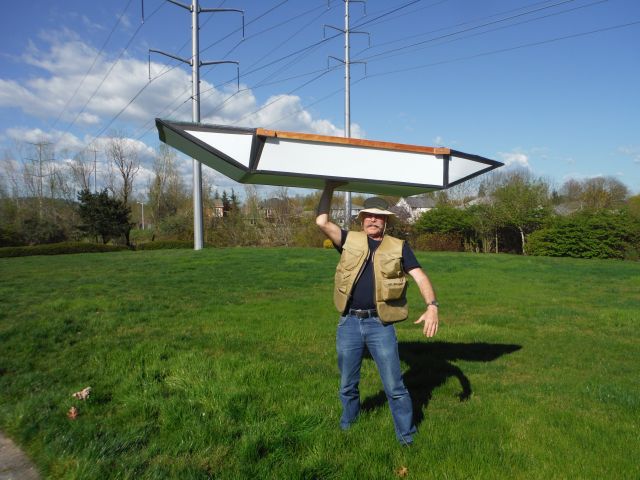
Greg is displaying his strength, although the hull only weighs 15 pounds !
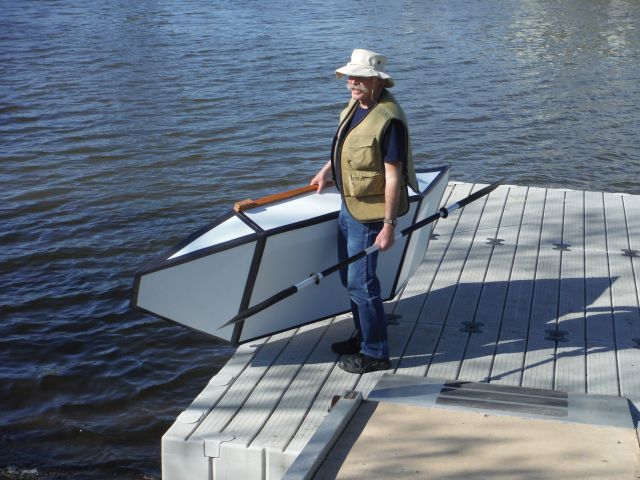
Now he is surveying the water conditions, before the maiden test.
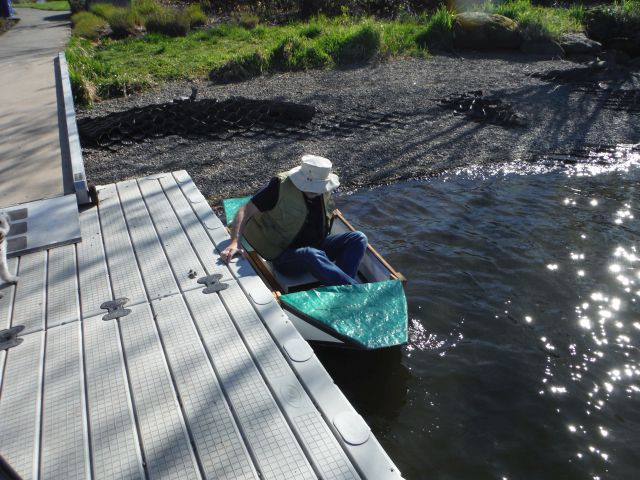
Getting in from the dock can be awkward, but it's better than getting the feet wet.
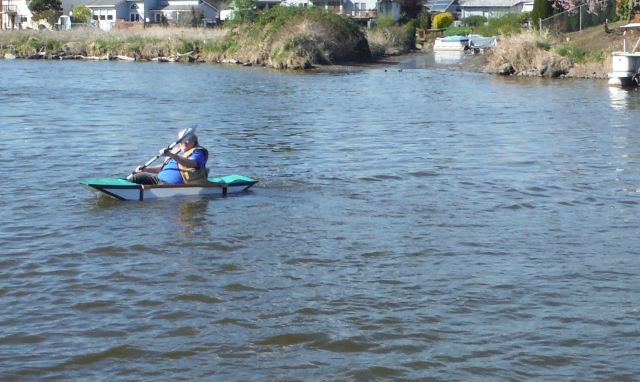
Finally on the open water. Not a drop came into the boat.
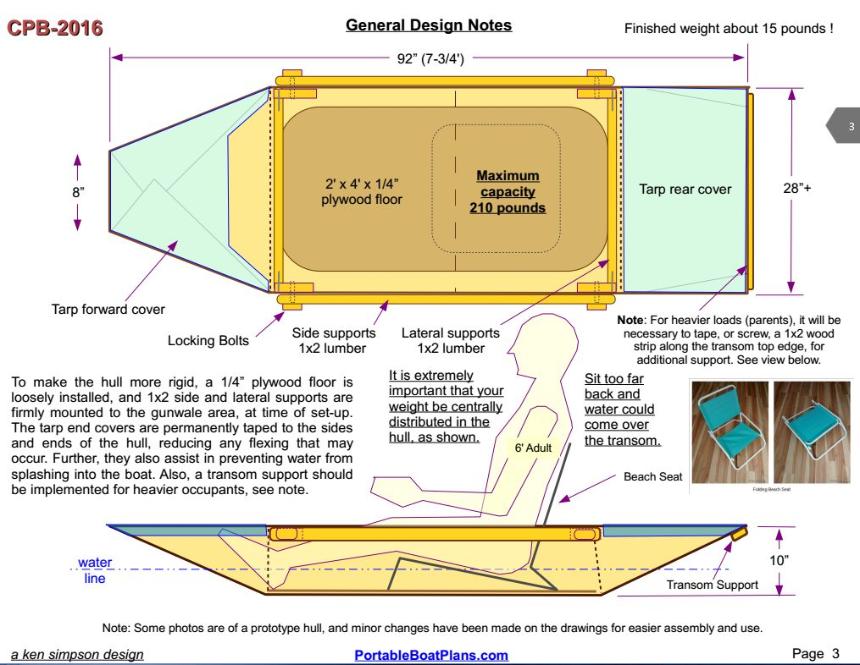
This is the design layout, with specific assembly notes.
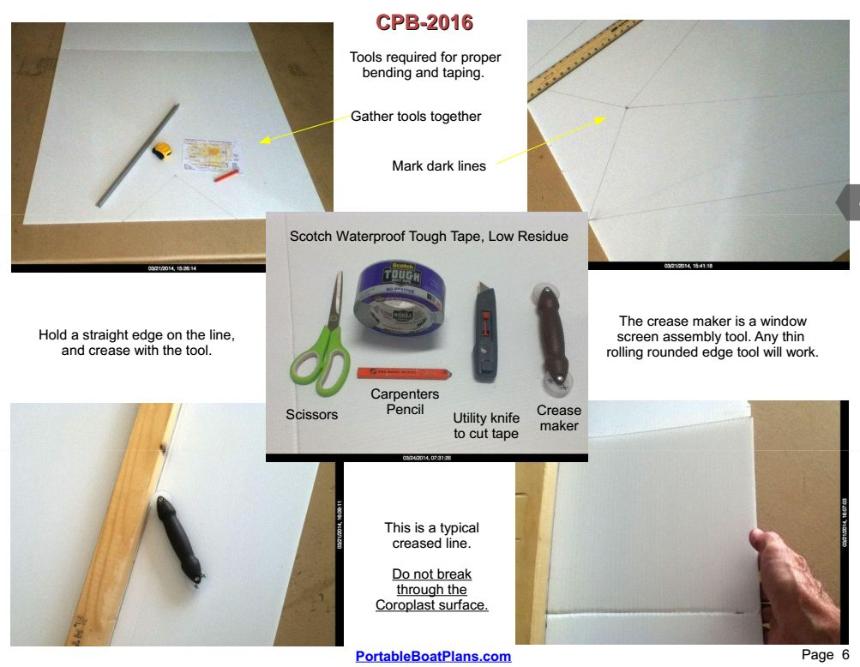
Page 6 of the plans, defining the assembly materials and process.
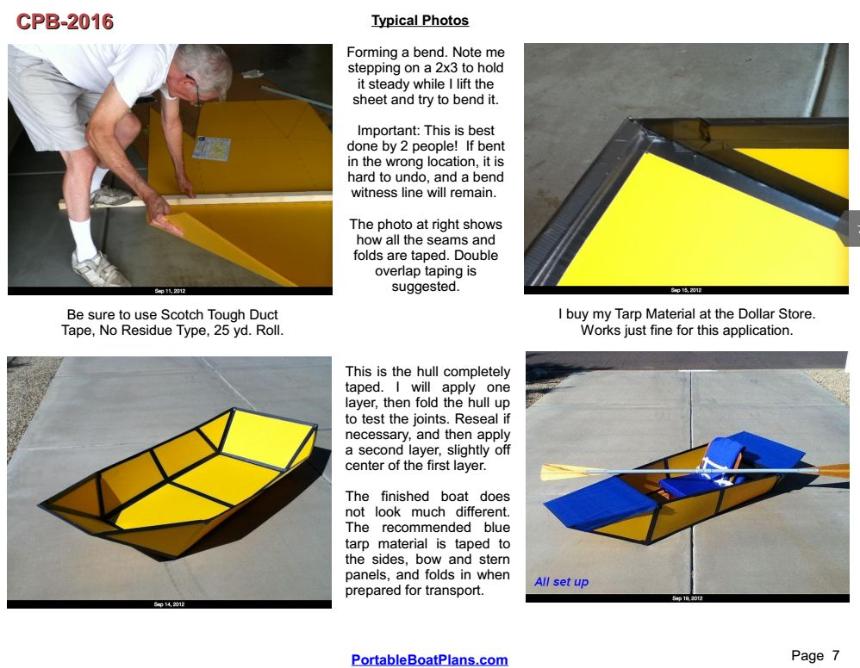
Finally, some assembly steps, showing the simple progression from sheet to hull !
Many thanks to Greg Marston, and his friend David Pierce, for making the CPB a reality !
To see a video of them at the lake, click on the YouTube link below.
7-07-2016
Below are photos of my prototype build, with additions and modifications for easier assembly.
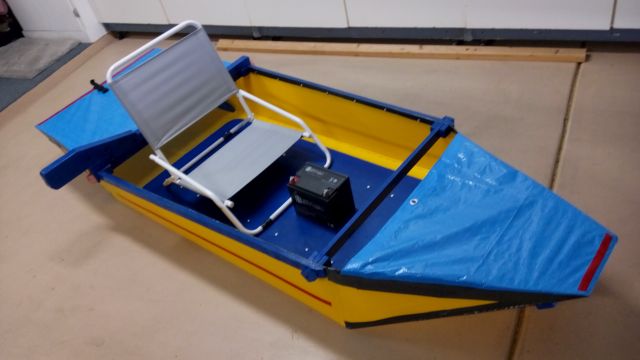
This is a photo of my build with the new Trolling Motor Mount, behind the pilot seat.
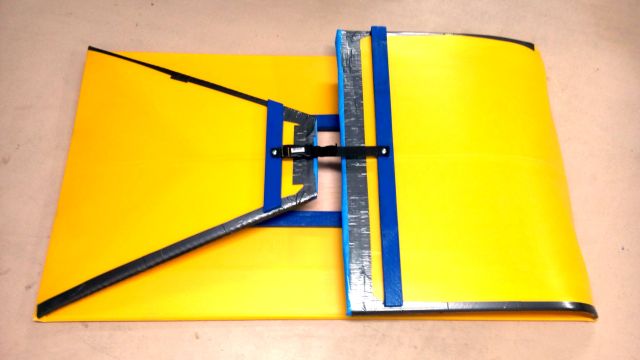
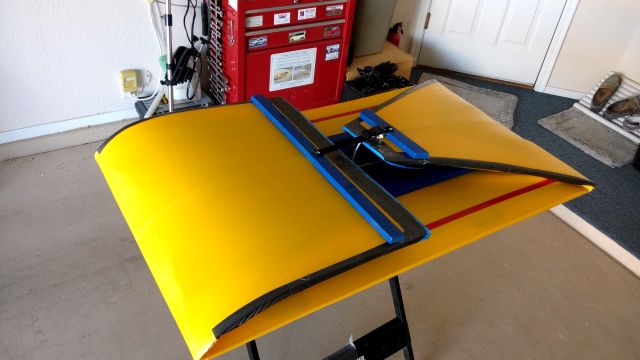
And this is the hull all folded and ready for transport. A simple pinch-to-release strap holds it all together !

7-22-2016
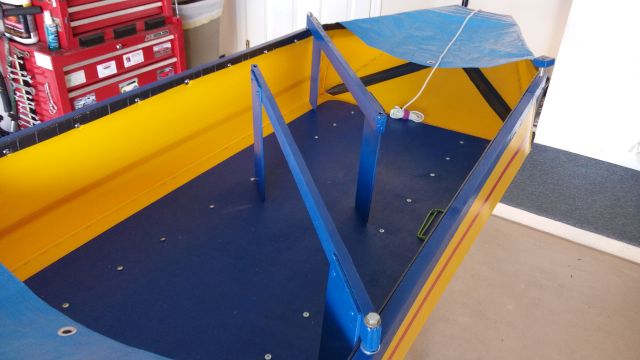
- These are the revised lateral supports with added side supports. They
minimize any side panel motion, providing greater hull stiffness. But,
because they are permanently mounted to each side rail, they are no
longer loose parts, and merely swing into position during assembly. A
single bolt in each one secures the hull, and the whole process takes
less than a minute of your time. It could not be any easier !
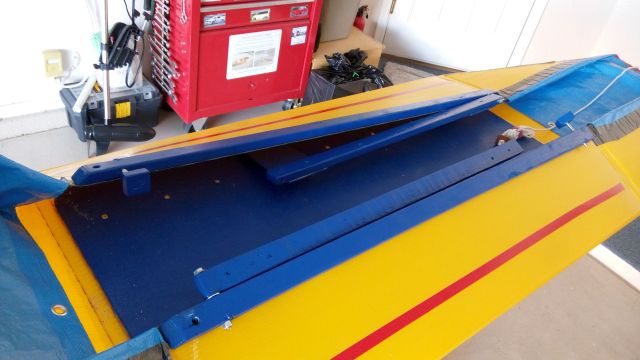
Folding the lateral supports outward toward the sides, and then folding inward the side panels.
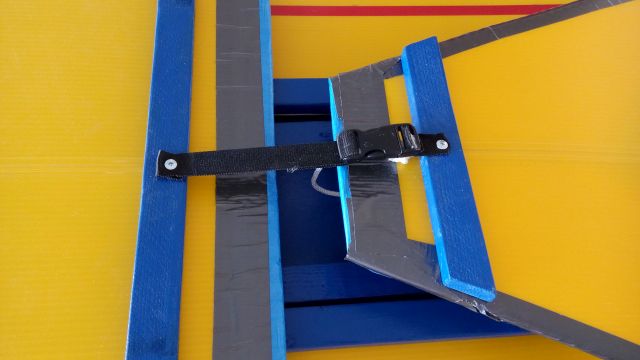
Finally, fold inward each end panel and secure with a snap strap, ready for transport in any vehicle.


Aucun commentaire:
Enregistrer un commentaire